

- True Sharps
- Large Broken Glass
- Plastic Pipette Tips
- Large Plastic Pipettes
- Large Glass Pipettes
- Other Solid Waste
- Aspirated Liquid Waste
- Other Liquid Waste
- Agar Plates
- Combining Solid and Liquid Waste in Red Bins
- Chemically Hazardous Biohazard Waste
- Radioactive Biohazard Waste
- Designated Waste Collection Areas
- Transport To and Storage Within the Autoclave Facility
- Autoclaving Conditions and Validation
Each section firstly stipulates the CL1 procedure then gives additional or special measures necessary to achieve CL2. Special measures replace the basic procedure whereas additional measures supplement it. Such measures are clearly indicated.
To reduce scope for error, every effort has been made to apply the same procedures to both the general laboratory and the TC suites. However, certain procedures will apply only to the general laboratory and some only to TC suites. Such procedures will be clearly indicated; all others apply to both areas.
Tissue Culture Waste Poster

Take a look at our Tissue Culture Waste Poster for some basic guidance on waste disposal in CL1 and CL2 tissue culture laboratories.
1. True Sharps
(updated 13/06/16)
 The following items must be disposed of via this route: needles (on their own or attached to syringes); scalpels; other types of cutting blade; glass pasteurs; microscope slides and coverslips; other intact, small glass items that will easily fit into a sharp-safe; small pieces of broken glass that will easily fit into a sharpsafe*.
The contaminated item must be fully emptied/discharged and deposited in an approved yellow sharpsafe (available from WTB Stores). Do not overfill sharpsafes! Once full to the maximum fill line, typically where the body of the container meets the lid, engage the permanent closure. Use a permanent black marker pen (please do not use autoclave tape; write directly onto the container) to clearly label the sharpsafe with your name, group and the word "Waste" and place in the designated waste collection area. It will then be collected by the CTS Technician and taken to the Clinical Waste Freezer in the JBC basement, room GL1-209, until Safety Services arrange for uplift by an external contractor.
Please note: the use of glass Pasteur pipettes is discouraged in favour of the plastic alternatives - pastettes. A range of plastic pastettes is available from WTB Stores. Click here for full guidance on use of sharps.
Special CL2 Measures:
- Use of sharps must be avoided unless essential.
- If using a Microbiological Safety Cabinet, store the sharpsafe within the cabinet during use and engage the permanent closure before removal.
- Do not place sharpsafes in red boxes .
2. Large Broken Glass
(added 22/9/15)
Larger pieces of contaminated broken glass, i.e. pieces that will not easily fit into a sharpsafe, will be collected by CTS for autoclaving and disposal providing the glass is placed in a red box, there are no other items in the box, the lid is securely taped down with autoclave tape and "BROKEN GLASS" is written clearly on the tape.
3. Plastic Pipettes Tips
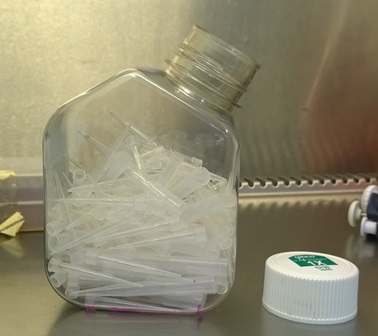 Plastic pipette tips are not true sharps but they can easily puncture the thin biohazard bin liners and inflict a scratch or puncture wound. For this reason, they must be placed in a robust, plastic, screw-cap container before being disposed of as Other Solid Waste. Plastic containers are available from Central Technical Services.
Plastic pipette tips may also be disposed of into a sharpsafe container, as per the disposal route for True Sharps, if this is more convenient.
Additional CL2 Measures:
- Dispose of capped, plastic container as Other Solid Waste, CL2.
- If working within a Microbiological Safety Cabinet and using a sharpsafe for disposal of True Sharps, use the existing sharpsafe for disposal of plastic pipette tips rather than store an additional waste container in the cabinet.
- If working within a Microbiological Safety Cabinet and not already using a sharpsafe for disposal of True Sharps, a robust, plastic, screw-cap container may be used for disposal of plastic pipette tips. Keep the container in the cabinet during use and cap before removal.
4. Large Plastic Pipettes
Make sure pipettes are fully discharged of liquid before disposal. Dispose of as Other Solid Waste.
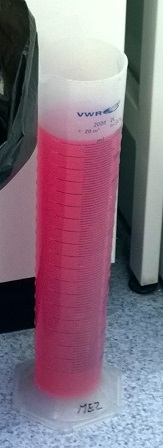
5. Large Glass Pipettes
Place into a 1 or 2 litre measuring cylinder filled with fresh 1% Virkon solution, tip down, immediately after use. Pipettes must be fully submerged. Pipettes are collected by the CTS Technician and transported to the central CTS facility. After rinsing and drying, pipettes are packed into metal canisters and dry heat sterilised ready for reuse.
Notes: Pipettes must be fully discharged of liquid before submersion in the Virkon solution. Renew the Virkon solution after 5 days or when the pink colour fades, whichever is soonest.
Special CL2 Measure:
- Do not use large glass pipettes. Use only large plastic pipettes.
6. Other Solid Waste
(updated 27/06/17)
 Dispose of into a lined, plastic biohazard bin. Liners and bins are provided by Central Technical Services. Do not overfill bin. Once full, liners are loosely sealed and taken by the CTS Technician for autoclaving. The CTS Technician will also place fresh liners in the bins. After autoclaving solid waste is packaged into tiger stripe bags and deposited in the blue trucks in room GL1-209.
Note: There must be no liquid or sharps in the solid waste bag.
Note: Biohazard bins for larger plastic pipettes contain TWO liners to prevent leaks.
Special CL2 Measures:
-
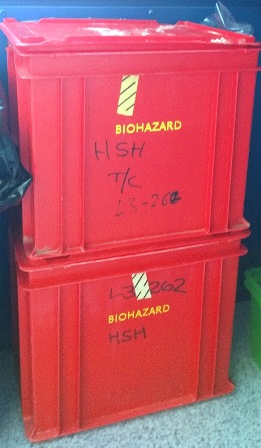
Do not use the plastic biohazard bins. Collect waste in a red, lined, biohazard labelled, autoclavable box. Boxes are available from the Central Technical Services. At the end of the work session: loosely tape up the neck of the liner; place the lid on the box; tape the lid onto the box with a strip of autoclave tape; clearly write "SOLID WASTE" on the tape. Store bin in the designated waste collection area, from where it will be collected and taken for autoclaving by the CTS Technician.
-
Note for CTS Technicians: Once the red boxes have been uplifted and taken to the waste room, put the box into the first available autoclave. Autoclave on a liquid waste cycle and dispose of the waste as usual.
7. Aspirated Liquid Waste
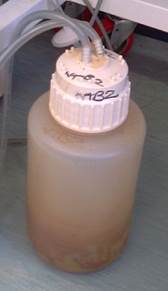 Only thick-walled, plastic bottles should be used in aspirator set-ups. Bottles and caps are available from Central Technical Services. To prevent growth in the waste culture during accumulation, the CTS Technician adds an aliquot of Terminex disinfectant to every fresh bottle to provide a final volume of at least 2% Terminex when the bottle is full. Do not overfill bottles. 0.22um in-line filters (available from the WTB Store) must be present on the vacuum pump/tap inlet to prevent contamination of the pump or house vacuum system.
When bottle is three quarters full, or on a weekly basis, depending upon which is more frequent, remove bottle, seal and replace with a fresh one. Clearly label the full bottle (use autoclave tape) as "LIQUID WASTE" then place in the designated waste collection area for uplift by the CTS Technician.
Decontaminated/sterilised liquid waste is disposed of to drains with copious amounts of cold water, via the CTS facility sluice.
Notes: It is the responsibility of the user to renew the in-line filters and tubing, as required. Waste tubing and filters must be treated as Other Solid Waste.
Special CL2 Measures:
- Do not use aspirator set-ups in the general lab. Follow the procedure for Other Liquid Waste, CL2.
- In TC, avoid using the aspirator setups if at all possible. If there is no alternative:
- Clearly label aspirator bottle to ensure CTS do not touch it.
- Check level of liquid in bottle before each use.
- Once three quarters full place everything, up to and including the in-line filter, into a red, lined, biohazard box and place in the designated waste collection area.
- Connect a fresh setup, including new in-line 0.22 micron filter, to the vacuum pump.
8. Other Liquid Waste
(updated 8/1/2020)
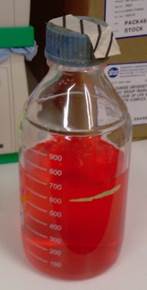
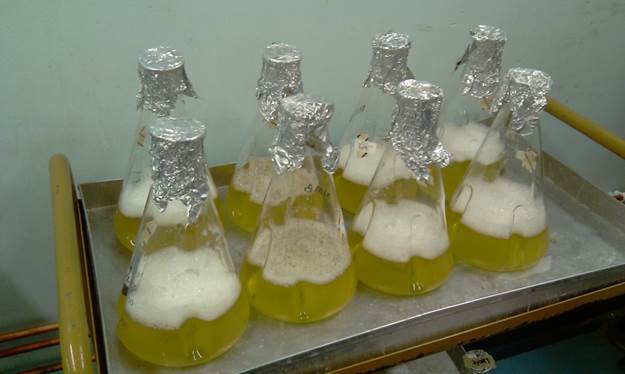
Collect in a suitable autoclavable container, e.g. conical flask or 500ml glass Duran bottle*. Do not overfill, i.e. no more tha 3/4 full. Cap with lid/foil, clearly label the container (use autoclave tape) as "LIQUID WASTE" and place in the designated waste collection area for uplift by the CTS Technician. After decontamination/sterilisation, liquid waste is disposed of to drains with copious amounts of cold water via the CTS facility sluice.
Do not add disinfectant to liquid waste destined for the autoclaves. Certain disinfectants, e.g. Virkon, decompose upon heating and release hazardous gasses that pose a serious risk to personnel within the autoclave facility.
*Note! Bottle must be glass, not plastic. Bottle must be of the Duran type, or another brand that is of equivalent quality and thickness and proved to withstand autoclaving temperatures and pressures. CTS have a stock of 500ml Duran bottles that you may use.
Special CL2 Measures:
- Container must be selable and leakprook. Use 500ml glass Duran bottles, NOT conical flasks.
- Clearly label the bottle with your name, lab of origin, nature of waste and the word “BIOHAZARD”.
-
If using a Microbiological Safety Cabinet, the container must be stored within the cabinet during use and sealed before removal.
-
Container must never be more than three quarters full.
-
At the end of the work session the container must be sealed for transport to the autoclave facility.
-
Place in a red, lined, biohazard labelled, autoclavable box; place the lid on the bin; tape the lid onto the bin with a strip of autoclave tape; clearly write "LIQUID WASTE" on the tape. Store bin in the designated waste collection area, from where it will be collected and taken for autoclaving by the CTS Technician.
-
CL2 waste must be autoclaved unless it is also chemically hazardous and/or radioactive.
9. Agar Plates
Treat as Other Solid Waste.
10. Combining Solid and Liquid Waste in Red Boxes
Special CL2 Measures: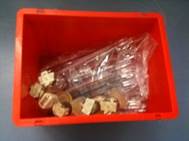
Ideally, CL2 solid and liquid waste should be collected in separate red boxes. However, if you have a small amount of both kinds of waste you may combine solid and liquid waste into one bin providing you put the liquid waste containers ON TOP of the solid waste bag, as opposed to in it or under it. Once full: place the lid on the bin; tape the lid onto the box with a strip of autoclave tape; clearly write "LIQUID WASTE" (even although the contents is mixed) on the tape. Store box in the designated waste collection area, from where it will be collected and taken for autoclaving by the CTS Technician.
11. Chemically Hazardous Biohazard Waste
Basic culture media ingredients are relatively innocuous, whereas many chemicals added to the basic media for the purposes of particular experiments are hazardous, e.g. compounds used to prevent contamination, select clones, damage DNA or fix cells. Usually, these chemicals are present at very low concentrations, i.e. micro or nano molar, and the media can be safely autoclaved and disposed of to drains. However, there may be instances when a hazardous chemical is present at a concentration that may pose a risk to people autoclaving the waste and/or the external environment. If risk assessment determines that this is the case (seek advice if needed), disinfect the culture with Virkon to neutralise the biohazard and, once disinfection is complete, dispose of as chemical waste. Remember to safely contain the disinfecting culture and clearly label with the nature of the sample, your name, the date and time to avoid accidental removal or confusion over disinfection time.
Notes: Disinfection must be validated.
Additional CL2 Measure:
- Ensure the container is clearly biohazard labelled and safely stored in a demarcated area during disinfection.
12. Radioactive Biohazard Waste
Do not autoclave! Disinfect with Virkon to neutralise the biohazard. Safely contain and adequately shield the disinfecting culture and, to avoid accidental removal or confusion over disinfection time, clearly label with the nature of the sample, your name, the date and time. Once disinfection is complete dispose of via a radioactive waste disposal sink - see your Radiation Protection Superviser for advice.
Notes: Disinfection must be validated.
Additional CL2 Measure:
- Ensure the container is clearly biohazard labelled and safely stored in a demarcated area during disinfection.
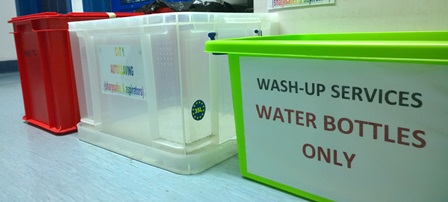
13. Designated Waste Collection Areas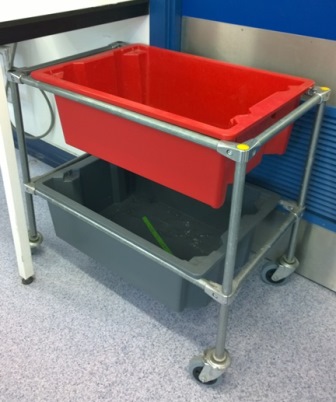
The location and nature of designated waste collection areas varies depending upon type/volume of waste and available space. Deep trolleys are used in some areas; other areas just have designated floor space. Non waste items destined for the autoclave/CTS facility are often stored next to the waste containers. It is important for research staff to have a clear understanding of what each different container is for in order to prevent items ending up in the wrong stream.
14. Transport To and Storage Within the Autoclave Facility
- Solid waste is safely transported from the laboratory of origin to the autoclave facility in a dedicated, lidded large white bin. The white bin is stored in a holding area within the autoclave facility. Once an autoclave becomes available, bags of waste are loaded from the holding area into the autoclave.
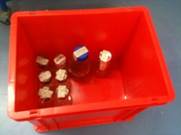
- Other waste containers are transported in plastic tubs, on a trolley or in a special deep trolley. Containers are unloaded from the plastic tubs to a demarcated holding area within the autoclave facility. Once an autoclave becomes available containers are loaded from the holding area into the autoclave.
- CTS Technicians are fully trained in the handling and transport of contaminated material and follow a documented SOP.
- Waste holding areas are clearly biohazard signed and demarcated.
Additional CL2 Measures:
- Solid waste is transported, held and autoclaved in the red, biohazard labelled, autoclavable boxes into which it was originally collected. This safely contains the waste and prevents any handling of the contents until after autoclaving.
- CL2 waste is autoclaved as soon as possible to prevent prolonged holding within the autoclave facility.
15. Autoclaving Conditions and Validation
(added 12/4/17)
- Solid waste is autoclaved at 134 degrees C for 5 minutes. Liquid waste is autoclaved at 121 degrees C for 20 minutes. These conditions are in keeping with the recommendations for steam sterilisation in the The International Pharmacopoeia, Sixth Edition, 2016, Section 5.8. (Conditions are also in-keeping with the HSE guidance on safe working and the prevention of infection in clinical laboratories and similar facilities, section 149. However, the version of this document that is currently available to download from the HSE web site has an error in section 149, table 2. This has been brought to the attention of the HSE and they have confirmed that the recommended holding time at 134 degrees C is 5 minutes and not 30 minutes.)
• If an autoclave cycle fails an authorisation code is required to proceed. Failed cycles are archived electronically. Potentially non-sterile loads are reprocessed.
• Steam sterilisation indicator tape is used along with chamber, drain and load probes; for liquid loads the load probe is submerged in an equivalent volume of liquid to the largest item in the load.
• Autoclaves are subject to an annual service, 12 point calibration and validation of standard loads. An additional 6 monthly service is also undertaken.
• Service/calibration/validation reports are kept in the Central Technical Service waste autoclave facility and electronically on SLS-cts shared drive. A electronic archive of each cycle is kept for minimum 1 year.